How Add META TAGS to Blogger(blogspot) blogs

Adding meta tags you can get get more traffic from search engines like google,yahoo,msn,etc,especially the meta description is the most important one. How Add META TAGS to Blogger(blogspot) blogs
Meta tags are the tags which describes your site and tells the search engines what your site is all about.Adding meta tags is an important factor in SEO.(Search Engine Optimisation).Meta tags allows search engines to index your web pages more accurately. In other words,Meta tags communicate with the search engines and tells more information about your site and make it index correctly and accurately. How Add META TAGS to Blogger(blogspot) blogs
We must add two main meta tags to the head section of the template.One is the Meta description which describes your site and another one is Meta Keywords which tells about your site keywords(what your site is all about)
Here is how to add meta tags to your blogger(blogspot) blog: How Add META TAGS to Blogger(blogspot) blogs
1.Sign in to your blogger dashboard-->click the 'Layout' button[see the screenshot below] How Add META TAGS to Blogger(blogspot) blogs


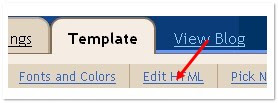
2.Click on the 'Edit html' tab How Add META TAGS to Blogger(blogspot) blogs


3.Find this code: How Add META TAGS to Blogger(blogspot) blogs
<b:include data='blog' name='all-head-content'/>

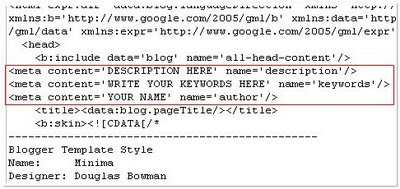
4.Now add below code just after the above code.Look at below: How Add META TAGS to Blogger(blogspot) blogs

<meta content='DESCRIPTION HERE' name='description'/><meta content='KEYWORDS HERE' name='keywords'/><meta content='AUTHOR NAME HERE' name='author'/>

Replace, How Add META TAGS to Blogger(blogspot) blogs
DESCRIPTION HERE:Write your blog description
KEYWORDS:Write the keywords of your blog
AUTHOR NAME:Write the author's name(Your name) How Add META TAGS to Blogger(blogspot) blogs
Now save your template. How Add META TAGS to Blogger(blogspot) blogs

How To Add Different Meta Tags to Different Blogger Posts

What's the use of adding different meta descriptions to different Blogger Posts? How To Add Different Meta Tags to Different Blogger Posts
It is very good for SEO (Search Engine Optimisation) . Actually, why we are adding meta tags is to tell search engines what that page is all about... but, using same meta tags to all of your blog posts lessens the search engine rankings and traffic little bit. How To Add Different Meta Tags to Different Blogger Posts
But, if you add different unique meta tags to different Blog posts, it makes the search engines to know more about your individual blog posts and make them crawl and index your pages better and it also improves your Search engine rankings for sure ;)
So, how to add this? How To Add Different Meta Tags to Different Blogger Posts
For this to happen, you have to add some pieces of codes to the template.
First Sign in to Blogger dashboard » Layout » Edit html
and find this line How To Add Different Meta Tags to Different Blogger Posts

<b:include data='blog' name='all-head-content'/>

and add this code just below that line How To Add Different Meta Tags to Different Blogger Posts
<b:if cond='data:blog.url == "http://www.bloggertipandtrick.net/"'>

<meta content='DESCRIPTION' name='description'/><meta content='KEYWORDS' name='keywords'/>

</b:if>

Now we have added meta tags to the homepage.
Next, you want to add meta description for your blogger post, for example let see how to add meta tags to below post :

http://www.bloggertipandtrick.net/2009/03/how-to-add-paypal-donate-button-to-your.html

This is the way to add meta tags to above post: How To Add Different Meta Tags to Different Blogger Posts
<b:if cond='data:blog.url == "http://www.bloggertipandtrick.net/2009/03/how-to-add-paypal-donate-button-to-your.html"'>

<meta content='How to add Paypal Button to your Blogger Blog, Adding Donations to your blog' name='description'/>

<meta content='Adding,Paypal,Donate,Button' name='keywords'/>

</b:if>

Now, what you have to do is pasting the above code below the home page meta tags and changing the link,description and keywords.
So, the final code now looks something like: How To Add Different Meta Tags to Different Blogger Posts
<b:if cond='data:blog.url == "http://www.bloggertipandtrick.net/"'>

<meta content='DESCRIPTION' name='description'/><meta content='KEYWORDS' name='keywords'/>

</b:if>

<b:if cond='data:blog.url == "http://www.bloggertipandtrick.net/2009/03/how-to-add-paypal-donate-button-to-your.html"'>

<meta content='How to add Paypal Button to your Blogger Blog, Adding Donations to your blog' name='description'/>

<meta content='Adding,Paypal,Donate,Button' name='keywords'/>

</b:if>

Just like the above procedure, you can add different meta tags to as many blog posts as you can. How To Add Different Meta Tags to Different Blogger Posts

How To Add One Click Sitemaps Submitter to blogger

With this tool your visitors can directly notify Google, Yahoo!, Ask.com and Moreover.com about their new or updated sitemaps file. How To Add One Click Sitemaps Submitter to blogger
1.Login to your dashboard--> layout- ->Page Elements
2.Click on 'Add a Gadget' on the sidebar.
3.Select 'HTML/Javascript' and add the code given below and click save. How To Add One Click Sitemaps Submitter to blogger


<script src="http://www.mypagerank.net/services/sn/servicesn_js.php"></script

Now you are done.It will look like this. How To Add One Click Sitemaps Submitter to blogger

Complete SEO Guide For Blogger|Blogspot

This Article will provide you complete guide on search engine optimization (SEO) for blogger templates.If you have any other ideas please leave a comment. Complete SEO Guide For Blogger|Blogspot

Meta Keywords and Description Complete SEO Guide For Blogger|Blogspot

Meta tags are very important for SEO.So you must add meta tags to your blogger blog for improve your seo. Complete SEO Guide For Blogger|Blogspot


Submit Your Sitemap to Search Engines Complete SEO Guide For Blogger|Blogspot


Change Blogger Default Title Tag


Default page title for a single Blogger post is BLOG TITLE: POST TITLE. You can improve SEO by changing the title tags to POST TITLE ~ BLOG TITLE.

Change Blogger Default Heading Tag


Heading Tag (h1, h2, h3, h4, h5) is also important for SEO. All of Blogger widgets (gadgets) title use h2 or h3 tags. If you want to improve SEO, you need to use h1 tag for post title.

Use Social Bookmarking Services


Adding social bookmarking links can help you build your traffic and improve SEO.

Use Related Posts Widget


Use Read More... Feature


Use Recent Posts,Recent Comments Widgets


Use Popular Post Widget


Use Labels / Tag Clouds


Use Breadcrumb


You can use breadcrumb to provide easy navigation for your visitor and increase page views.

Submit Blog to Blog Directories


How to Add Adsense ads inside Blogger blog posts or between blog posts

How to place adsense ads inside Blogger blog Posts: How to Add Adsense ads inside Blogger blog posts or between blog posts
1.Sign in to your blogger dashboard>layout>Edit html
Check the box next to 'Expand Widget Templates'
2.Scroll down the window till you see this code How to Add Adsense ads inside Blogger blog posts or between blog posts
<b:if cond='data:post.includeAd'> <data:adEnd/> <data:adCode/> <data:adStart/> </b:if>

3.Replace that code in the template with the below code How to Add Adsense ads inside Blogger blog posts or between blog posts
<b:if cond='data:blog.pageType != "item"'> <b:if cond='data:post.includeAd'> <data:adEnd/> <data:adCode/> <data:adStart/> </b:if> </b:if>

4.Again,scroll down the template and find out data-post body tag and paste the below code just above that code{this will show ads above the post body.If you want ads to show below the post,paste the code below that tag.
Here is the code to paste:- How to Add Adsense ads inside Blogger blog posts or between blog posts
<b:if cond='data:blog.pageType == "item"'> <b:if cond='data:post.includeAd'> <data:adEnd/> <data:adCode/> <data:adStart/> </b:if> </b:if>

That's it! How to Add Adsense ads inside Blogger blog posts or between blog posts

How to place adsense ads between Blog posts: How to Add Adsense ads inside Blogger blog posts or between blog posts
1.Sign in to your blogger dashboard>click on the layout link
2.Click on the Edit link in the "Blog Posts' column How to Add Adsense ads inside Blogger blog posts or between blog posts
..............a pop up window opens.......... How to Add Adsense ads inside Blogger blog posts or between blog posts
3.Check the box next to 'Show ads between Posts'
next,configure the ads,choose the format,colours,etc and SAVE THE CHANGES.
That's it! Now your adsense ads will show between blog posts. How to Add Adsense ads inside Blogger blog posts or between blog posts

How To Make Money With Adsense Without Your Website

Direct Download Center 100% Adsense Revenue Sharing Program How To Make Money With Adsense Without Your Website
DirectDownloadCenter.com is free software download center. You can download any Freeware and Shareware directly from publisher. They have setup a system to share 100% AdSense revenue to all contributing members from all traffic that you sent to their site.
It is easy to use DirectDownloadCenter.com to earn advertising revenue. There are two ways to do it: How To Make Money With Adsense Without Your Website
1. Link to any pages of DirectDownloadCenter.com using your referrer code. Traffic sent from your link will display Google Ads using your Adsense ID 90%. How To Make Money With Adsense Without Your Website
2. Referring your friends to be our member and getting your ads displayed on their traffic 10% of the time. It's easy, just link to any pages using your referrer code and wait for his/her registering. How To Make Money With Adsense Without Your Website
All you have to do is to guide your friends to download software from them or invite your friends to be their member and start getting money!!. How To Make Money With Adsense Without Your Website
Publish or share software with your friends and start getting money too!! How To Make Money With Adsense Without Your Website
Join Now!! Make Money With Adsense Without Your Website. Apply now!

How To Insert Adsense Ads In Blogger Post


This will explain how to Embedd adsense ads in between posts body. How To Insert Adsense Ads In Blogger Post
1.Generate Parsed code for adsense code because we cannot put adsense code directly in the xml.So parse it using AdParser.
2.After parsing,your ad code Should look like this.

 How To Place ad above or below your post header
log in to your dashboard--> layout- -> Edit HTML
Click on "Expand Widget Template" and  scroll down  to where you see this:- How To Insert Adsense Ads In Blogger Post
<div class='post-header-line-1'/>

To place ad above your post header.Paste the code above this line.
To place ad below your post header.Paste the code below this line. How To Insert Adsense Ads In Blogger Post
How To Place ad end of your post body

log in to your dashboard--> layout- -> Edit HTML
Click on "Expand Widget Template" and  scroll down  to where you see this:- How To Insert Adsense Ads In Blogger Post
<p><data:post.body/></p>

Paste the code below this line, to show your ad at the end of your post. How To Insert Adsense Ads In Blogger Post
NOTE : To Set the Align of your ad , Insert your code like this. How To Insert Adsense Ads In Blogger Post
<p align="center"> Your Ad code
</p>


Replace "center" with "left" or "right" for desired alignment. How To Insert Adsense Ads In Blogger Post

How to Embed Adsense add unit in Left or Right corner of post content


This will explain How to Embed Adsense add unit in Left or Right corner of post content
Generate Parsed code for adsense code because we cannot put adsense code directly in the xml.So parse it using AdParser. How to Embed Adsense add unit in Left or Right corner of post content
After parsing,your ad code Should look like this. How to Embed Adsense add unit in Left or Right corner of post content
 
 
1.Log in to your dashboard--> layout- -> Edit HTML
2.Click on "Expand Widget Templates"
3.Scroll down to where you see this:- How to Embed Adsense add unit in Left or Right corner of post content
<div class='post-header-line-1'/>

4.To place ad Top left corner of your post ,Paste the below code, below of above line. How to Embed Adsense add unit in Left or Right corner of post content
<div style=”display:block;float:left;margin: 0px 10px 0px 0px;”>
Your Adsense Parsed code
</div>

How to Embed Adsense add unit in Left or Right corner of post content

Attention :  We can't put "<div style=”display:block;float:left;margin: 0px 10px 0px 0px;”>" and "</div>" directly in the xml.So we must generate Parsed code for these code using AdParser.
How to Embed Adsense add unit in Left or Right corner of post content
So Final Code you have to copy below the line "<div class='post-header-line-1'/>" ,look like this.


If you Want To place ad Top Right corner of your post,Replace "left" with "right". How to Embed Adsense add unit in Left or Right corner of post content


5.Click on "Save Templates" and Refresh your site. How to Embed Adsense add unit in Left or Right corner of post content

How to put AdSense in the Middle or Anywhere of Blogger posts

If you want to put Adsense ads in the middle of Blogger posts follow the steps below.
1.Generate Parsed code for your adsense code because we cannot put adsense code directly in the xml.So parse it using AdParser. How to put AdSense in the Middle or Anywhere of Blogger posts
After parsing,your ad code Should look like this. How to put AdSense in the Middle or Anywhere of Blogger posts


2.Log in to your dashboard--> layout- -> Edit HTML
3.Click on "Expand Widget Templates"
4.Scroll down to where you see this: How to put AdSense in the Middle or Anywhere of Blogger posts
<data:post.body/>

5.Now replace above code with below code. How to put AdSense in the Middle or Anywhere of Blogger posts
<div expr:id='"aim1" + data:post.id'></div> <div style="clear:both; margin:10px 0">
<!-- Your AdSense code here -->
</div>
<div expr:id='"aim2" + data:post.id'>
<data:post.body/>
</div>
<script type="text/javascript">
var obj0=document.getElementById("aim1<data:post.id/>");
var obj1=document.getElementById("aim2<data:post.id/>");
var s=obj1.innerHTML;
var r=s.search(/\x3C!-- adsense --\x3E/igm);
if(r>0) {obj0.innerHTML=s.substr(0,r);obj1.innerHTML=s.substr(r+16);}
</script>

Note : You must you must replace <!-- Your AdSense code here --> with Your Adsense Parsed code. How to put AdSense in the Middle or Anywhere of Blogger posts
6.Now save your template.
7.In every blog post ,Put this special code : How to put AdSense in the Middle or Anywhere of Blogger posts
<!-- adsense -->

in the exact point you want to appear AdSense advertising.Now you are done. How to put AdSense in the Middle or Anywhere of Blogger posts

How To Remove AdSense Ads from the Homepage

This post explains how to hide Google Adsense Ads In Home Page And display them only Inside Post pages Alone.

If you want to hide Google Adsense Ads In Home Page ,follow the steps below.

1.Generate Parsed code for your adsense code because we cannot put adsense code directly in the xml.So parse it using AdParser.
After parsing,your ad code Should look like this.

2.Log in to your dashboard--> layout- -> Edit HTML
3.Click on "Expand Widget Templates"
4.Scroll down to where you see this:

<data:post.body/>

5.Now Copy below code and paste it before the above line.

<b:if cond ='data:blog.pageType == "item"'> <!-- Your AdSense code here -->
</b:if>

Note : You must you must replace <!-- Your AdSense code here --> with Your Adsense Parsed code.
6.Now save your template and you are done.

How To Add Adsense Parser to blogger

You must generate Parsed code for your adsense code because you cannot put adsense code directly in the xml.So parse it using Adsense Parser tools.This tool help your visitors to parse their adsense code.I found this tips from here .

Parsed code will look like this :

1.Login to your dashboard--> layout- ->Page Elements
2.Click on 'Add a Gadget'.
3.Select 'HTML/Javascript' and add the code given below and click save.


<iframe src ="http://tools.bloggerplugins.org/parser.php"width="100%" style="border: none" height="300"</iframe>


 It will look like this.


Now you are done.

How To Add 728×90 leaderboard Adsense ads between Header and Post Section in blogger

1.Log in to your dashboard--> layout- -> Edit HTML
2.Click on "Expand Widget Templates"
3.Scroll down to where you see this:


<b:section class='crosscol' id='crosscol' showaddelement='no'/>

4.Now replace above code with below code.


<b:section class='crosscol' id='crosscol' showaddelement='yes'/>

5.Now save your template.
6.Go to Layout > Page Elements
7.Now Click on new 'Add a Gadget' option that will now have appeared between Blog Posts and the Header.


8.Select 'HTML/Javascript' and add your 728x90 leaderboard Adsesne code and click save.
Now you are done.

How To Use Adsense Section Targeting on Blogger

What is Google Adsense Section targeting? Here is the official information on Adsense Help Center:
  • Section targeting allows you to suggest sections of your text and HTML content that you'd like us to emphasize or downplay when matching ads to your site's content. By providing us with your suggestions, you can assist us in improving your ad targeting. We recommend that only those familiar with HTML attempt to implement section targeting.
  • To implement section targeting, you'll need to add a set of special HTML comment tags to your code. These tags will mark the beginning and end of whichever section(s) you'd like to emphasize or de-emphasize for ad targeting.
  • The HTML tags to emphasize a page section take the following format:

<!-- google_ad_section_start --> YOUR PAGE CONTENT
<!-- google_ad_section_end -->

Now, how can you implement Adsense Section Targeting on New Blogger? If you want to get relevant ads, applying Adsense Section Targeting to your blog use above the code before and after post titles and post content.
Follow these steps to do it.
1.Log in to your dashboard--> layout- -> Edit HTML
2.Click on "Expand Widget Templates"
3.Scroll down to where you see this:

<b:includable id='post' var='post'>
<div class='post uncustomized-post-template'>
<a expr:name='data:post.id'/>
<b:if cond='data:post.title'>
<h3 class='post-title'>
<b:if cond='data:post.link'>
<a expr:href='data:post.link'><data:post.title/></a>
<b:else/>
<b:if cond='data:post.url'>
<a expr:href='data:post.url'><data:post.title/></a>
<b:else/>
<data:post.title/>
</b:if>
</b:if>
</h3>
</b:if>

4.Now replace above code with below code.

<b:includable id='post' var='post'>
<div class='post uncustomized-post-template'>
<a expr:name='data:post.id'/>
<b:if cond='data:post.title'>
<h3 class='post-title'>
<b:if cond='data:post.link'>
<a expr:href='data:post.link'><!-- google_ad_section_start --><data:post.title/><!-- google_ad_section_end --></a>
<b:else/>
<b:if cond='data:post.url'>
<a expr:href='data:post.url'><!-- google_ad_section_start --><data:post.title/><!-- google_ad_section_end --></a>
<b:else/>
<!-- google_ad_section_start --><data:post.title/><!-- google_ad_section_end -->
</b:if>
</b:if>
</h3>
</b:if>

5.Now again scroll down to where you see this:

<data:post.body/>

6.Now replace above code with below code.

<!-- google_ad_section_start --><data:post.body/><!-- google_ad_section_end -->

7.Now save your template and you are done.

How To Remove Low paying Adsense Ads

To increase your Adsense Earnings by removing the lowpaying adsense ads from your account,follow the steps below.

1.First go to www.adsblacklist.com .


2.Now Signup for a account.it's free and very simple.
3.Now login to your account.
4.Now Click on My Account.


5.Now click on 'Add New Domain'


4.Submit your URL,TITLE and Keywords.Look at the example below.


5.Now go to Generate Filter List.


6.Drag and drop your domain name into 'Keywords from selected domains:' box.Then you can see keywords,you give in step 4.
7.Now select 'MFA' and 'LCPC'.


8.Now click on Submit.
9.They will give you lowpaying ads urls.copy these urls.
10.Now login to your Google Adsense Account.
11.Click AdSense Setup.


12.Go to Competitive Ad Filter category.


13.Paste lowpaying ads urls into the box and click save changes.


14.Now google will not display low paying ads in your site.

Most Wanted Best Adsense Tips And Secrets

Most Wanted Best Adsense Tips And Secrets

AdSense Tip 1: Find Best keywords for your content

Before serving ads on a web page, check its keyword density. You can find many free keyword analyzer tools in internet searching the word "free keyword analyzer".

AdSense Tip 2: Improve your keywords

Get keyword suggestions from Google AdWords Sandbox. Get new keywords that can help you improve your ad relevance.

AdSense Tip 3: Make content rich websites

This means that content-rich websites of a popular topic should attract a large amount of ads.

AdSense Tip 4: Write a new page/blog post every day

This is very important. The more content you have, the more visitors you will get. Put an Adsense unit on each and every content page of your site.

AdSense Tip 5: Choose the right AdSense format

The top three AdSense formats are for many webmasters:
336x280 large rectangle
300x250 medium rectangle
160x600 wide skyscraper
Another successful format is the 728x15 horizontal ad links, that can be placed under your navigation bar.
Use "Allowed site" feature of adsense to protect yourselves.If anyone put adsense codes in their websites you must not worried about it.

AdSense Tip 6: Adsense Color tips

When creating your Google AdSense ads it is recommended to use the color scheme and style of your website so that the ads blend in well.Google Ads with no background color and no borders will always perform better. Make the border color and background color same as your page background color.

AdSense Tip 7: Position tips

Place the AdSense ads in a prominent place around the top/left part of your page or under your headlines.
For short articles, CTR is best when ads are placed just above the content.
For long articles, CTR will improve if you place ads somewhere in middle of the content or just where the article ends.
Use Text Ads instead of Image Ads as users get more options and the payout is often higher.
Important:Don't places images next to Google ads as that will invite a permanent ban to your AdSense account.

AdSense Tip 8: Increase the number of ads, but not too much

If you have a lot of text on a page, use multiple AdSense units. You can use up to three AdSense units on a page, two AdSense search boxes and one unit of ad links.

AdSense Tip 9: Preview Google ads

You can find out what ads will be served by Google AdSense if you install Google AdSense Preview Tool, a very simple tool available only for Internet Explorer 6.0. Click to advertiser sites without generating invalid clicks, and easily add their URLs to your URL filter list. Because AdSense uses geo-targeting, Google serves different ads for other countries.

AdSense Tip 10: What not to do with adsense

Don't click on your own ads
Don't ask others to click on your Google ads
Don't manually change AdSense code
Don't place Google ads on sites that include prohibited content (e.g.: adult sites)
Don't employ cloaking, hidden text or farm links
Don't use AdSense ads on the same page with similar ads (e.g.: Yahoo Publisher Network)
And also don't refresh your site excessively.

AdSense Tip 11: Use section targeting

Use section targeting to emphasize some content in your page.To know more about section targeting read this article.

AdSense Tip 12: Your Google ads should be visible

Make sure your text ads are visible well to the surfers in all screen formats.

AdSense Tip 13: Use AdSense channels

You can categorize the content of your website into channels and then track your performance. This way you can experiment with different types of ads and see which is performing the best.

AdSense Tip 14: Follow Adsense Programme Polices

Strictly follow the rules mentioned in Adsense policies. You will always earn more monet from Adsense if you do it.

AdSense Tip 15:Never modify the Google Adsense HTML code

If have trouble embedding AdSense code in your Blogger template, read these articles.

AdSense Tip 16: Don't place ads in pop-up windows,error pages,empty pages

You must always remember to not to do it.

AdSense Tip 17: Don't start a "MFA"(made for adsense) web site

You will never make money out these Made for Adsense websites. Instead, write on topics what you are passionate about. Don't waste your money and time searching on high-paying adsense keywords lists.

AdSense Tip 18: Block Low Paying Adsense Ads

Block low paying advertisers with Filters.For more info read this article.

AdSense Tip 19: Adsense For Search

Always select the setting to open Google Adsense search box results in a new browser window, so you won't lose your visitors.

How To Refresh Your Blog or Website Automatically

How To Refresh Your Blog or Website Automatically

1.Login to your blogger dashboard--> layout- -> Edit HTML
2.Scroll down to where you see <head> tag .
3.Copy below code and paste it just after the <head> tag.

<meta HTTP-EQUIV='refresh' content='15;URL=http://yoursite.com'/>

Note: Replace http://yoursite.com with your blog or website URL.
15 is the time period between 2 page refresh.Change it as your choice.
4.Now save your template and you are done.

Numbered Page Navigation Hack For Bloggers

Numbered Page Navigation Hack For Bloggers


1.Login to your blogger dashboard--> layout- -> Edit HTML
2.Scroll down to where you see ]]></b:skin> tag .
3.Copy below code and paste it just before the ]]></b:skin> tag.

Numbered Page Navigation Hack For Bloggers
.showpageArea a {
text-decoration:underline;
}
.showpageNum a {
border:1px solid #CCCCCC;
margin:0 3px;
padding:3px 7px;
text-decoration:none;
}
.showpageNum a:hover {
background-color:#CCCCCC;
border:1px solid #CCCCCC;
}
.showpagePoint {
-moz-background-clip:border;
-moz-background-inline-policy:continuous;
-moz-background-origin:padding;
background:#CCCCCC none repeat scroll 0 0;
border:1px solid #CCCCCC;
color:#333333;
margin:0 3px;
padding:3px 7px;
text-decoration:none;
}
.showpageOf {
margin:0 3px 0 0;
padding:3px 7px;
text-decoration:none;
}
.showpage a {
border:1px solid #CCCCCC;
padding:3px 7px;
text-decoration:none;
}
.showpage a:hover {
text-decoration:none;
}
.showpageNum a:link, .showpage a:link {
color:#333333;
text-decoration:none;
}

4.Now save your template.
5.Go to Layout-->Page Elements and click on "Add a gadget".
6.Select "html/java script" and add the code given below and click save.Now drag your new gadget under "Blog Posts" Section.

Gadget under Blog Posts Section.
<script type='text/javascript'>

var home_page_url = location.href;

var pageCount=1;
var displayPageNum=3;
var upPageWord ='Previous';
var downPageWord ='Next';

function showpageCount(json) {
var thisUrl = home_page_url;
var htmlMap = new Array();
var thisNum = 1;
var postNum=1;
var itemCount = 0;
var fFlag = 0;
var eFlag = 0;
var html= '';
var upPageHtml ='';
var downPageHtml ='';

for(var i=0, post; post = json.feed.entry[i]; i++) {

var timestamp1 = post.published.$t.substring(0,19)+post.published.$t.substring(23,29);
timestamp = encodeURIComponent(timestamp1);

var title = post.title.$t;

if(title!=''){
if(itemCount==0 || (itemCount % pageCount ==(pageCount-1))){
if(thisUrl.indexOf(timestamp)!=-1 ){
  thisNum = postNum;
}

if(title!='') postNum++;
htmlMap[htmlMap.length] = '/search?updated-max='+timestamp+'&max-results='+pageCount;
}
}
itemCount++;

}

for(var p =0;p< htmlMap.length;p++){
if(p>=(thisNum-displayPageNum-1) && p<(thisNum+displayPageNum)){
if(fFlag ==0 && p == thisNum-2){
if(thisNum==2){
 upPageHtml = '<span class="showpage"><a href="/">'+ upPageWord +'</a></span>';
}else{
 upPageHtml = '<span class="showpage"><a href="'+htmlMap[p]+'">'+ upPageWord +'</a></span>';
}

fFlag++;
}

if(p==(thisNum-1)){
html += '<span class="showpagePoint">'+thisNum+'</span>';
}else{
if(p==0){
  html += '<span class="showpageNum"><a href="/">1</a></span>';

}else{
 html += '<span class="showpageNum"><a href="'+htmlMap[p]+'">'+ (p+1) +'</a></span>';
}
}

if(eFlag ==0 && p == thisNum){
downPageHtml = '<span class="showpage"> <a href="'+htmlMap[p]+'">'+ downPageWord +'</a></span>';
eFlag++;
}
}
}

if(thisNum>1){
html = ''+upPageHtml+' '+html +' ';
}

html = '<div class="showpageArea"><span  class="showpageOf"> Pages ('+(postNum-1)+')</span>'+html;

if(thisNum<(postNum-1)){
html += downPageHtml;
}

if(postNum==1) postNum++;
html += '</div>';

var pageArea = document.getElementsByName("pageArea");
var blogPager = document.getElementById("blog-pager");

if(postNum <= 2){
html ='';
}

for(var p =0;p< pageArea.length;p++){
pageArea[p].innerHTML = html;
}

if(pageArea&&pageArea.length>0){
html ='';
}

if(blogPager){
blogPager.innerHTML = html;
}

}

function showpageCount2(json) {

var thisUrl = home_page_url;
var htmlMap = new Array();
var isLablePage = thisUrl.indexOf("/search/label/")!=-1;
var thisLable = isLablePage ? thisUrl.substr(thisUrl.indexOf("/search/label/")+14,thisUrl.length) : "";
thisLable = thisLable.indexOf("?")!=-1 ? thisLable.substr(0,thisLable.indexOf("?")) : thisLable;
var thisNum = 1;
var postNum=1;
var itemCount = 0;
var fFlag = 0;
var eFlag = 0;
var html= '';
var upPageHtml ='';
var downPageHtml ='';

var labelHtml = '<span class="showpageNum"><a href="/search/label/'+thisLable+'?&max-results='+pageCount+'">';
var thisUrl = home_page_url;

for(var i=0, post; post = json.feed.entry[i]; i++) {

var timestamp1 = post.published.$t.substring(0,19)+post.published.$t.substring(23,29);
timestamp = encodeURIComponent(timestamp1);

var title = post.title.$t;

if(title!=''){
if(itemCount==0 || (itemCount % pageCount ==(pageCount-1))){
if(thisUrl.indexOf(timestamp)!=-1 ){
 thisNum = postNum;
}

if(title!='') postNum++;
htmlMap[htmlMap.length] = '/search/label/'+thisLable+'?updated-max='+timestamp+'&max-results='+pageCount;

}
}
itemCount++;
}

for(var p =0;p< htmlMap.length;p++){
if(p>=(thisNum-displayPageNum-1) && p<(thisNum+displayPageNum)){
if(fFlag ==0 && p == thisNum-2){
if(thisNum==2){
 upPageHtml = labelHtml + upPageWord +'</a></span>';
}else{
 upPageHtml = '<span class="showpage"><a href="'+htmlMap[p]+'">'+ upPageWord +'</a></span>';
}

fFlag++;
}

if(p==(thisNum-1)){
html += '<span class="showpagePoint">'+thisNum+'</span>';
}else{
if(p==0){
 html = labelHtml+'1</a></span>';
}else{
 html += '<span class="showpageNum"><a href="'+htmlMap[p]+'">'+ (p+1) +'</a></span>';
}
}

if(eFlag ==0 && p == thisNum){
downPageHtml = '<span class="showpage"> <a href="'+htmlMap[p]+'">'+ downPageWord +'</a></span>';
eFlag++;
}
}
}

if(thisNum>1){
if(!isLablePage){
html = ''+upPageHtml+' '+html +' ';
}else{
html = ''+upPageHtml+' '+html +' ';
}
}

html = '<div class="showpageArea"><span  class="showpageOf"> Pages ('+(postNum-1)+')</span>'+html;

if(thisNum<(postNum-1)){
html += downPageHtml;
}

if(postNum==1) postNum++;
html += '</div>';

var pageArea = document.getElementsByName("pageArea");
var blogPager = document.getElementById("blog-pager");

if(postNum <= 2){
html ='';
}

for(var p =0;p< pageArea.length;p++){
pageArea[p].innerHTML = html;
}

if(pageArea&&pageArea.length>0){
html ='';
}

if(blogPager){
blogPager.innerHTML = html;
}

}

</script>
<script type='text/javascript'>

var thisUrl = home_page_url;
if (thisUrl.indexOf("/search/label/")!=-1){
if (thisUrl.indexOf("?updated-max")!=-1){
var lblname1 = thisUrl.substring(thisUrl.indexOf("/search/label/")+14,thisUrl.indexOf("?updated-max"));
}else{
var lblname1 = thisUrl.substring(thisUrl.indexOf("/search/label/")+14,thisUrl.indexOf("?&max"));
}
}

var home_page = "/";
if (thisUrl.indexOf("?q=")==-1){
if (thisUrl.indexOf("/search/label/")==-1){
document.write('<script src="'+home_page+'feeds/posts/summary?alt=json-in-script&callback=showpageCount&max-results=99999" ><\/script>')
}else{document.write('<script src="'+home_page+'feeds/posts/full/-/'+lblname1+'?alt=json-in-script&callback=showpageCount2&max-results=99999" ><\/script>')
}
}
</script>

Note:
Change values of pageCount,displayPageNum,upPageWord,downPageWord if you like.

Customizing Embedded Comments Below Posts

Ok, if you don't know what are Embedded Comments, or want them on your Blog, read this article.
Here, we are going to customize them a little bit. On the picture below, you can see the default appearance of embedded comments.


Looks all right, but we can do better...
First thing, back-up your template. Then go to: DASHBOARD -- LAYOUT -- EDIT HTML. Find the following part of code (use CTRL + F for searching):


#comments h4 {
margin:1em 0;
font-weight: bold;
line-height: 1.4em;
text-transform:uppercase;
letter-spacing:.2em;
color: $sidebarcolor;
}

#comments-block {
margin:1em 0 1.5em;
line-height:1.6em;
}
#comments-block .comment-author {
margin:.5em 0;
}
#comments-block .comment-body {
margin:.25em 0 0;
}
#comments-block .comment-footer {
margin:-.25em 0 2em;
line-height: 1.4em;
text-transform:uppercase;
letter-spacing:.1em;
}
#comments-block .comment-body p {
margin:0 0 .75em;
}
.deleted-comment {
font-style:italic;
color:gray;
}
 

DELETE it, and REPLACE it with following code:

 
#comments h4 {
margin: 1em 3em;
font-weight: bold;
line-height: 1.4em;
color: #ffffff;
}
#comments-block {
margin-left:1.5em;
line-height:1.6em;
background: #ffffff;
color: black;
padding: 1em;
border:0px solid #ffffff;
}
#comments-block .comment-author {margin:.5em 0;}
#comments-block .comment-body {margin:.25em 0 0; background: #ffffff;}
#comments-block .comment-footer {
margin:-.25em 0 2em;
line-height: 1.4em;
letter-spacing:.1em;
}
#comments-block .comment-body p {
margin:0 0 .75em;
padding: 20px 10px 10px 10px;
background: #f3a64c url(http://i38.tinypic.com/27yu1xl.jpg) no-repeat top left;
}
.deleted-comment {
font-style:italic;
color:gray;
}
 

The URL in red color is the address of picture used in this tutorial. If you would like to use that one, it's ok. But, also, you can make your own pic. Just size it properly.

Ok. This is how it how it looks like now. But, keep in mind that you can do a lot more with just changing the code a bit. Here's another example, done with the same template as before...I've changed the template background, added some borders to comment box, and colored it blue...
Not much, but it's already happier.....

One more thing. If you want to change the "Post a comment", to something else (like "say something"), find the following code (EXPAND WIDGET TEMPLATES):


<h4 id='comment-post-message'><data:postCommentMsg/></h4>


..and REPLACE the part in red with anything you want. So it will look like this:


<h4 id='comment-post-message'>Say something...</h4>


Well, this was a long one.....Smile!

Quotes in Blogger - Customization


We're going to learn how to customize the quotes in Blogger. By customize, I mean changing the looks of it, giving it some color, borders, background.....changing size of it, font, style...

WHAT ARE QUOTES?
Quotes are used for quoting. Heh. Quoting defines:

► repeating or copying the words of another, usually with acknowledgment of the source
► citing or referring for illustration or proof
► repeating a brief passage or excerpt

DEFAULT QUOTES IN BLOGGER AND HOW TO USE THEM
Default quotes ain't much of a fun. Really. They are rather dull. And blank.
When you're composing the Post, and want to make a quotation, you will:

► highlight the part of the text that will be a quote
► and click on the quote button in the Blogger toolbar

This will change highlighted part into a quote, with a default design, and that is:
It just added some margins to it....not fun at all. I told you so.

SO, WHAT CAN WE DO?
Well, a lot! First, let's see what part of the code (CSS style) we have to play with....

.post blockquote {
margin:1em 20px;
}
.post blockquote p {
margin:.75em 0;
}
 

...that's the one! You can find it easily going to LAYOUT ► EDIT HTML ► and scroll until you find it (use CTRL + F to make it easier)...
...yours may be a bit different (if you have customized template), but it will be something like that...

I'll show you a few examples, and in each one, you will have to DELETE the code from above, and REPLACE it with the one from example.

Borders, font styles and colors
Example 1Example 2Example 3Example 4
backgroundbackgroundbackgroundbackground
Example 1.
 
.post blockquote {
border-top: 1px solid #FF82AB;
border-left: 1px solid #FF82AB;
border-right: 2px solid #FF82AB;
border-bottom: 2px solid #FF82AB;
background: #ffffff;
margin: 6px 20px 6px 20px;
padding: 8px 8px 8px 8px;
font-size: 1em;
font-style:italic;
line-height:1.4em;
}
 
Example 2.
 
.post blockquote {
border:1px dashed #DC143C;
background: #EEE0E5;
margin: 6px 10px 6px 10px;
padding: 8px 8px 8px 8px;
font-size: 1em;
font-style:italic;
line-height:1.4em;
}
 
Example 3.
 
.post blockquote {
color:#EE9A00;
border:5px dotted #000000;
background: #ffffff;
margin: 6px 6px 6px 6px;
padding: 8px 8px 8px 8px;
font-size: 1em;
line-height:1.4em;
}
 
Example 4.
 
.post blockquote {
color:#00CED1;
border-top: 2px solid #000000;
border-left: 2px solid #000000;
border-right: 1px solid #000000;
border-bottom: 1px solid #000000;
background: #ffffff;
margin: 6px 0px 6px 0px;
padding: 8px 8px 8px 8px;
font-size: 1em;
line-height:1.4em;
}
 

...these are just examples, so you can see what variables you can adjust....
...change the colors (hex values)...change border styles...
...font size, font style (italic), font color (color)...
...margins (the space between box and the post content)...
...padding (space between quote text and the borders)...

Picture in the quotes
Example 1Example 2Example 3Example 4
backgroundbackgroundbackgroundbackground
Example 1.
 
.post blockquote {
color:#666666;
background: #ffffff url(http://i39.tinypic.com/154iuq9.jpg);
background-position:top left;
background-repeat:no-repeat;
margin: 6px 6px 6px 6px;
padding: 8px 0px 8px 74px;
font-size: 14px;
font-style:italic;
line-height:1.4em;
}
 
Example 2.
 
.post blockquote {
border-top: 1px solid #FFF;
border-left: 1px solid #FFF;
border-right: 1px solid #666666;
border-bottom: 1px solid #666666;
background: #000000 url(http://i37.tinypic.com/23tgzfk.jpg);
background-position:top left;
background-repeat:repeat-y;
margin: 0 20px;
padding: 10px 20px 10px 45px;
font-size: 0.9em;
}
 
Example 3.
 
.post blockquote {
background: #ffffff url(http://i44.tinypic.com/slh4yu.jpg);
background-repeat:no-repeat;
background-position:top center;
margin: 6px 6px 6px 6px;
padding: 8px 36px 8px 40px;
font-size: 14px;
line-height:1.4em;
}
 
Example 4.
 
.post blockquote {
color:#000000;
background: #ffffff url(http://i41.tinypic.com/24fh84w.jpg);
margin: 6px 6px 6px 6px;
padding: 8px 6px 8px 6px;
font-size: 14px;
line-height:1.4em;
}
 

...remember to change the URL address of the pic with your own...
...you have lots of options here....be creative...change....
...trial and error...
...read some more about background pictures is Blogger...

If you have some doubts/questions, just ask....

Categories

25 Tips for Marketing Your Blog (1) 7 Tips (2) 7 ขั้นตอนง่ายๆ ที่จะทำให้ Search Engine (1) Add Adsense inside Blogger (1) Add Copy To (1) Add Favicon (1) Add Favicon on Blog (1) Adding a Favicon on Blogger (1) AdSense in the Middle or Anywhere of Blogger (1) Adsense Parser to blogger (1) Affiliate Programs (1) AI RoboForm (1) Amazon (2) Amazon Associate (1) Amazon Associates (2) Auto Slider to Blogger (1) Automatically Refresh Your Blog (1) Best Adsense Secrets (1) Best Adsense Tips (1) Best Adsense Tips And Secrets (1) Blog (2) Blog and Make Money (1) Blog Tips (4) blog to make money (1) Blogads.com (1) Blogger (1) Blogger Dummies (1) Blogger Guide (1) blogger hack (1) Blogger Hacks (1) Blogger Help (1) Blogger Instructions (1) Blogger Make Me Rich (3) Blogger Tag (1) Blogger Tips (2) Blogger Tricks (1) Blogging (1) Blogs Tools (3) Boost Traffic (1) Change Template (2) Change the Width of Your Blog (1) cloud (1) Cloud Widget (1) Comments Below Posts (1) Complete SEO Guide For Blogger|Blogspot (1) Create a Blogger Tag Cloud Widget (1) Crispads.com (1) CSS (1) Customization Blogger (1) Customization Quotes in Blogger (1) Customize (2) Customizing Comments Below Posts (1) Digg (1) Digg Button (1) Disable Your computer might be at risk (1) Embed Adsense add unit in Left or Right corner of post content (1) Favicon on Blogger (1) fill forms (1) Footer (1) form filler (1) form filling software (1) Google Adsense (1) How Add META TAGS to Blogger (1) How Add META TAGS to Blogger(blogspot) blogs (1) How To Add 728×90 leaderboard Adsense ads between Header and Post Section in blogger (1) How to Add Adsense ads inside Blogger blog posts or between blog posts (1) How To Add Adsense Parser to blogger (1) How To Add Different Meta Tags to Different Blogger Posts (1) How To Add One Click Sitemaps Submitter to blogger (1) How to blog to make money (2) How to Embed Adsense add unit in Left or Right corner of post content (1) How To Insert Adsense Ads In Blogger Post (1) How To Make Money With Adsense (1) How To Make Money With Adsense Without Your Website (1) How to put AdSense in the Middle or Anywhere of Blogger posts (1) How To Refresh Your Blog (1) How To Remove AdSense Ads from the Homepage (1) How To Remove Low paying Adsense Ads (1) How To Use Adsense Section (1) How To Use Adsense Section Targeting on Blogger (1) Insert Ads In Blogger Post (1) Insert Adsense In Blogger Post (1) JavaScript (1) Keyword (1) label (1) Label cloud (1) Labels (1) Link in Footer (1) Make the Blog Wider (1) Meta Tag (1) meta tags (2) Mootools Featured Posts Auto Slider (1) Move To to (1) Newer + Older Posts (1) newerPageTitle (1) nextprev (1) Numbered Page Blog (1) Numbered Page Navigation Hack For Bloggers (1) olderPageTitle (1) password management (1) password manager (1) Poly Wi-Fi (1) Posts Auto Slider (1) Promote Blog (2) Quotes in Blogger (1) Read More (1) Read More in blogger (2) ReadMore blogger (1) Refresh Your Blog (1) Relate Post (2) Relate Post Widget (1) Remove AdSense Ads from the Homepage (1) Remove Blogger Navbar (1) Remove the NavBar (1) RoboForm (1) Search Engine Friendly (1) Search Engine Optimization (1) SEO (8) SEO (Search Engine Optimization) (2) SEO เคล็ดลับ โปรโมท (1) Slider to Blogger (1) Successful Blogging (1) Tag Blogger (1) Template (1) Tip Adsense (2) Tips (3) Tips Ads (1) Tips Adsense (3) Tips and Tricks (1) Tips for Marketing (1) widget (1) widget label (1) XP Tweaks (1) Your Blog (1) ขั้นตอนการทำ SEO (2) เคล็ดลับ (1) เคล็ดลับ โปรโมท (1) โปรโมท (2) โปรโมทเวบ (1) เรื่องอื่นๆที่ใกล้เคียง ใน Blogger (1) วิธีการทำ Label cloud (1) วิธีทำ Relate Post (1) วิธีทำลิงค์ Read More... ใน blogger (1) วิธีทำเว็บให้น่าใช้งาน (1) วิธีลับในการหาข้อมูลจาก Google (1) เว็บให้ดัง (1)
 
Copyright © 2009 Blogger Template Designed by All about Blogger Tips